Your Guide to State of Michigan Car Decals: Styles & Best Care Tips!
For many vehicle owners, showcasing their connection to the Great Lakes State through state of Michigan car decals is a popular form of personal expression. These distinctive automotive accessories are designed to withstand diverse weather conditions, from summer sun to harsh winter elements, if properly applied and maintained. Understanding the correct application process and ongoing care tips is crucial for preserving the vibrancy and longevity of your Michigan-themed vehicle graphics. This guide will provide essential insights to ensure your decal remains a proud emblem for years to come.
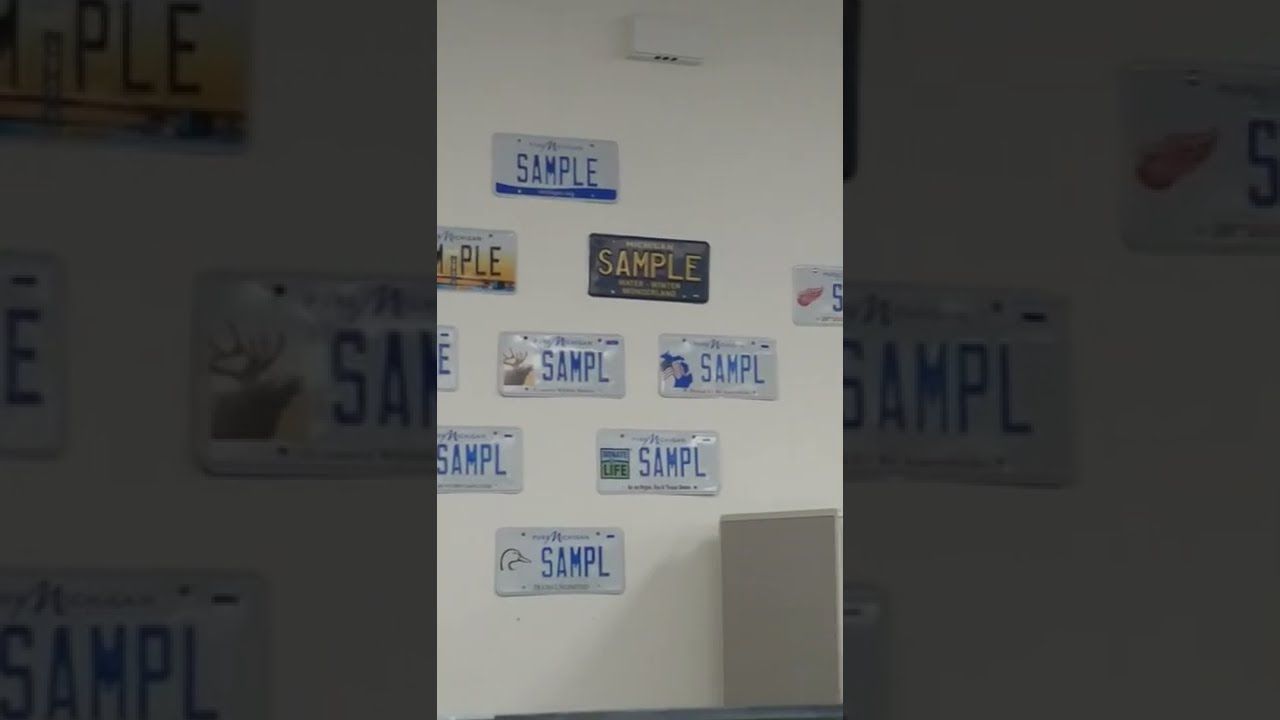
Image taken from the YouTube channel MI Troll TV , from the video titled State of Michigan License Plates .
From the iconic outline of the Lower Peninsula to the rugged beauty of the Upper Peninsula, Michigan is a state brimming with natural wonders, vibrant communities, and a fiercely proud populace. It's no surprise, then, that car decals have become a ubiquitous and beloved form of self-expression among residents across the entire Michigan landscape. These small, yet impactful, adornments transform automotive vehicles into moving canvases, proclaiming everything from deep state pride and love for the Great Lakes to support for local sports teams or favorite outdoor pursuits. Whether you're commuting through Detroit, exploring the Sleeping Bear Dunes, or traversing the Mackinac Bridge, chances are you'll spot countless vehicles proudly displaying their Michigan spirit.
What This Comprehensive Guide Will Cover
This guide aims to be your definitive resource for navigating the world of Michigan car decals. We understand that selecting the perfect design is just the first step; ensuring its lasting presence and vibrant appearance on your vehicle requires a bit of know-how.
Throughout these pages, we'll dive deep into:
- Exploring Popular Decal Styles: Discover the most beloved designs that capture the essence of Michigan, from classic state outlines to intricate representations of local landmarks and nature. We'll help you find a
decal stylethat truly resonates with your personal connection to the Great Lakes State. - Essential Decal Care Tips: Learn the best practices for applying, cleaning, and maintaining your decals. Proper
decal careis crucial, especially given Michigan's diverse weather conditions, which can range from harsh winters to intense summer sun. - Ensuring Decal Longevity: We'll share expert advice on how to protect your investment and maximize
decal longevity, ensuring your chosen design remains vibrant and securely affixed to yourautomotive vehiclesfor years to come.
By the end of this guide, you'll be equipped with all the knowledge needed to confidently choose, apply, and care for your Michigan car decals, allowing you to proudly showcase your state pride wherever the road takes you.
Our journey into the world of Michigan car decals begins by understanding their widespread appeal, and now we dive deeper into what specific styles resonate most with residents. Moving from the general popularity we discussed, let's explore the vibrant and varied designs that allow Michiganders to showcase their pride on the road, alongside the critical importance of material quality.
Embracing Michigan Spirit: Popular Decal Styles
Car decals in Michigan are more than just adhesive art; they are powerful statements of identity, allegiance, and connection to a beloved state. This section dives into the diverse range of popular styles that allow residents to proudly display their Michigan spirit, and crucially, why high-quality vinyl material is the superior choice for automotive applications, ensuring both enduring appeal and durability.
Representing Your Passion: Common Themes for State of Michigan Car Decals
From the bustling streets of Detroit to the serene shores of the Upper Peninsula, Michigan vehicle owners find myriad ways to express their connection to the Great Lakes State. The themes chosen for decals often reflect deep-seated passions and regional pride.
- Showcasing Allegiance to Michigan Sports Teams: It's no secret that Michigan boasts a passionate sports culture. Decals proudly display logos and mascots of professional powerhouses like the Detroit Lions (NFL), Detroit Red Wings (NHL), Detroit Tigers (MLB), and Detroit Pistons (NBA). Beyond the professional arena, local high school mascots and team colors are equally popular, celebrating community spirit and school pride from Friday night lights to championship seasons. These decals visually unite hundreds of thousands of fans across the state.
- Displaying Pride with University Logos: For many, an alma mater represents a significant chapter in their lives. University logos are a prevalent decal choice, allowing alumni and fans to celebrate their academic achievements and continued loyalty. From the iconic block 'M' of the University of Michigan to the Spartan helmet of Michigan State University, and symbols representing Wayne State University, Grand Valley State University, and dozens of other colleges, these decals are a testament to academic pride and enduring school spirit.
- Great Lakes Region Inspired Designs: The natural beauty of Michigan, particularly its unparalleled connection to the Great Lakes, inspires countless decal designs. You'll frequently see stylized maps of the Michigan peninsula, often highlighting the distinct Upper and Lower Peninsulas, or featuring the state's picturesque lighthouses—Michigan boasts more lighthouses than any other state, with over 120 dotting its vast coastline. Other popular designs incorporate freshwater fish, native wildlife like deer or bears, and intricate natural landscapes that evoke the state's unique outdoor heritage.
- Other Distinctive Regional Themes: Beyond sports and nature, many decals capture the essence of Michigan's diverse culture and landmarks. This might include imagery related to the state's rich automotive history, symbols of its vibrant cherry or apple orchards, or even playful nods to local sayings or inside jokes specific to Michigan's distinct regions. These designs often embody a deeper, more personal connection to the Michigan way of life.
Material Matters: Why Vinyl Material Reigns Supreme for Car Decals
While design captures the eye, the material ensures longevity. For automotive vehicles, the choice of decal material is paramount, and high-quality vinyl material consistently outperforms other options due to its unique properties and resilience.
- Understanding the Properties of High-Quality Vinyl Material: Professional-grade vinyl, particularly cast vinyl, is engineered for outdoor use on vehicles. It’s incredibly durable, yet flexible enough to conform to the subtle curves of a car's body. Unlike cheaper alternatives, quality vinyl maintains its color vibrancy and structural integrity over time. It's typically thin, ensuring a sleek, painted-on look that resists peeling and snagging.
- The Critical Importance of UV Resistance and Weather Durability: Michigan's diverse climate presents a significant challenge for any outdoor product. From scorching summer sun, where UV rays can rapidly fade colors and degrade materials, to harsh winters with freezing temperatures, heavy snow, road salt, and ice, car decals must withstand extreme conditions. High-quality vinyl is formulated with UV resistance to prevent fading and cracking, ensuring the colors remain vibrant for years. Its weather durability means it won't warp, shrink, or become brittle under temperature fluctuations, protecting your investment and preserving the decal's aesthetic appeal through all four seasons. Many professional-grade vinyl decals are designed to last five to seven years or more outdoors without significant degradation.
- The Role of Robust Adhesive in Ensuring Secure Attachment: Beneath the vibrant surface lies the unsung hero: the adhesive (decals). A strong, yet carefully formulated, adhesive is crucial for secure and lasting attachment to various automotive vehicle surfaces—from painted metal to glass. Superior adhesives bond firmly without damaging the vehicle's finish upon proper application or removal. This ensures the decal stays put through car washes, high speeds, and temperature changes, preventing frustrating peeling at the edges or corners that can quickly ruin the appearance of even the most beautiful design.
Once you've chosen the perfect high-quality vinyl decal to express your Michigan pride, the next critical step is ensuring it's applied flawlessly. A well-chosen decal needs proper installation to truly shine and withstand the elements.
Mastering Decal Application for Your Automotive Vehicles
Achieving a professional look for your car decals starts with proper application. This crucial section provides a step-by-step guide to preparing your vehicle's surface and flawlessly applying your new decal, helping you avoid common mistakes and ensure optimal adhesion and a sleek finish.
Pre-Application Essentials for Optimal Adhesion
The foundation of a long-lasting, bubble-free decal lies in thorough pre-application preparation. Don't skip these vital steps!
Selecting the Ideal Placement: Windows Versus Paint
Consider both visibility and surface suitability when deciding where your new decal will go.
- Vehicle Windows: Often a popular choice for decals due to excellent visibility and less risk of damaging your car's paint upon removal. Back windows or side windows (ensuring no obstruction to driver's view, especially in states like Michigan which have regulations about front window obstructions) are common. Glass surfaces are generally very smooth, making bubble-free application easier.
- Vehicle Paint: Offers a larger canvas and can make your decal truly stand out. When applying to painted surfaces, ensure the area is free of waxes, sealants, or ceramic coatings, as these can interfere with the decal's adhesive. While high-quality vinyl decals are designed to be paint-safe, extreme care during removal can help prevent damage.
Thorough Cleaning and Preparation of the Surface
Proper surface preparation is non-negotiable for superior adhesion and to prevent unsightly bubbles or peeling.
- Wash the Area: Start by washing the intended application area with mild soap and water. This removes loose dirt and grime. Rinse thoroughly.
- Degrease and Clean: After washing, use rubbing alcohol (isopropyl alcohol) or a dedicated automotive surface prep cleaner on a clean, lint-free microfiber cloth. This step is crucial for removing any oils, waxes, residues, or stubborn dirt that soap and water might miss. These contaminants are the primary culprits behind poor adhesion and bubbling.
- Dry Completely: Allow the surface to dry completely. Any residual moisture can cause bubbles or prevent the adhesive from bonding correctly. You can use a clean, dry microfiber cloth or let it air dry.
- Ideal Temperature: For best results, apply decals in a moderate temperature range, ideally between 50°F and 80°F (10°C and 27°C). Extreme heat or cold can affect the adhesive's performance, making the decal harder to apply smoothly or less likely to bond securely.
Step-by-Step Guide to Flawless Decal Application
With your surface prepped, it's time for the main event! Follow these detailed steps for a smooth, precise application.
Detailed, Instructional Steps for Applying Car Decals Smoothly and Precisely
Gather your tools: you'll need your decal, a squeegee (often included with the decal, or a credit card wrapped in a soft cloth), masking tape, a measuring tape, and a clean, lint-free cloth.
-
Positioning (The Hinge Method):
- Place the decal (with its backing paper and transfer tape still attached) onto the desired spot on your vehicle.
- Using a measuring tape, adjust its position until it's perfectly straight and centered.
- Apply a strip of masking tape vertically down the center of the decal, creating a "hinge." For smaller decals, you can tape across the top edge.
- This hinge will keep your decal from shifting during application.
-
Peeling the Backing Paper (Half at a Time):
- Flip one half of the decal over the masking tape hinge.
- Slowly and carefully peel away the backing paper (the waxy, solid paper layer) from the transfer tape (the clear or paper layer holding your decal design). Peel at a sharp angle, ensuring the vinyl decal adheres to the transfer tape.
- If any part of the decal sticks to the backing paper, press the transfer tape back down and rub it firmly before trying again.
-
Applying the First Half:
- With the backing paper removed from one half, slowly lower the transfer tape (with the decal attached) back down onto the vehicle surface.
- Starting from the masking tape hinge and working outwards, use your squeegee to firmly smooth the decal onto the surface. Apply even pressure, overlapping strokes slightly, to push out any air bubbles.
- Repeat this process for the other half of the decal: flip it over the hinge, remove the remaining backing paper, and squeegee it down.
-
Final Squeegee:
- Once the entire decal is applied, give the entire surface of the transfer tape another firm rub with your squeegee, paying close attention to all edges and intricate parts of the design. This ensures maximum adhesion of the vinyl to your vehicle.
-
Removing the Transfer Tape:
- Wait a few minutes to allow the adhesive to bond. Then, starting from a corner, slowly peel back the transfer tape at a sharp, acute angle, almost parallel to the vehicle surface. This angle helps prevent the vinyl decal from lifting with the tape.
- If any part of the decal starts to lift, stop, press the transfer tape back down, and firmly rub over that area with your finger or squeegee before trying to peel again.
Tips for Avoiding Common Pitfalls and Achieving a Professional Finish
Even with careful steps, minor issues can arise. Here's how to tackle them:
- Preventing Bubbles: The most common issue! Thorough surface cleaning and applying firm, even pressure with your squeegee are your best defenses. Work from the center outwards or from one side to the other, never trapping air.
- Fixing Small Bubbles: For tiny bubbles that appear after application, use a very fine needle or pin to gently prick the edge of the bubble. Then, use your thumb or squeegee to press the air out towards the pinprick. Larger bubbles may be more stubborn; prevention is key.
- Avoiding Wrinkles: Take your time. Apply slowly and deliberately, constantly smoothing with the squeegee as you go. Never rush the application process.
- Dealing with Dust/Debris: Ensure your application environment is as clean and dust-free as possible. Even tiny particles trapped under the decal can create unsightly bumps.
- Curing Time: After application, it's advisable to let the decal "cure" or bond with the surface for 24 to 48 hours before washing your vehicle or exposing it to harsh conditions. This allows the adhesive to fully set, ensuring maximum longevity and preventing lifting.
While mastering the art of applying your automotive decals lays the groundwork for a stunning appearance, the next crucial step is ensuring that vibrant look lasts for years. Proper care and proactive protection against environmental wear are vital to preserving your investment.
Maximizing Decal Longevity: Essential Decal Care Tips
To keep your Michigan car decals looking vibrant and sharp for years to come, proper care is essential. This section offers practical advice on routine cleaning and crucial protection strategies to combat Michigan's varied climate, ensuring your investment maintains its integrity and visual appeal against environmental wear.
Routine Cleaning Decals for Lasting Vibrancy
Regular cleaning is fundamental to maintaining the vividness and integrity of your car decals. Neglecting this can lead to dirt and grime embedding into the vinyl, dulling its appearance and potentially shortening its lifespan.
Recommended Methods and Products for Safely Cleaning Decals
When it comes to cleaning decals, gentle is key. Avoid harsh chemicals, abrasive cleaners, or stiff brushes, which can scratch the vinyl material or degrade the adhesive (decals). Instead, opt for a mild car wash soap (pH-neutral) mixed with water.
- Hand Washing: The safest and most effective method. Use a soft sponge or a microfiber wash mitt.
- Soap Choice: Look for a car wash soap that is specifically designed for automotive finishes and is pH-neutral. Many common household detergents can be too harsh and may strip the vinyl's protective layers or cause discoloration.
- Rinsing: Always pre-rinse your vehicle thoroughly to remove loose dirt and grit before applying soap. This prevents scratching the decal during the washing process.
Techniques to Prevent Scratching or Lifting the Adhesive (Decals) During Cleaning
Proper technique is crucial to prevent damage to your decals.
- Gentle Pressure: Apply very light pressure when washing over decals. Never scrub aggressively.
- Wipe, Don't Rub: Wipe in one direction (ideally from the center outwards) rather than scrubbing in circles, which can lift edges or trap dirt.
- Rinse Thoroughly: After washing, rinse the decals and surrounding areas completely to remove all soap residue. Leftover soap can dry and leave streaks or even attract more dirt.
- Pat Dry: Instead of wiping vigorously, gently pat the decals dry with a clean, soft microfiber towel. Air drying is also an option, but patting helps prevent water spots, especially in hard water areas. Avoid using high-pressure washers directly on the decals, as the force can lift the edges of the vinyl.
Protecting Your Investment: Ensuring Weather Durability and UV Resistance
Beyond regular cleaning, safeguarding your decals against environmental elements is paramount for their longevity. This is especially true in regions like Michigan, where weather conditions can be particularly challenging.
Understanding How Michigan's Weather Conditions Impact Car Decals
Michigan's diverse climate poses significant challenges for car decals. The state experiences extreme temperature fluctuations, from scorching summers that can reach into the 90s°F (30s°C) to freezing winters often dipping below 0°F (-18°C), alongside heavy snowfall and intense UV radiation.
- UV Radiation: Prolonged exposure to the sun's ultraviolet (UV) rays is a primary culprit in decal degradation. UV radiation causes colors to fade over time, making vibrant decals appear dull and washed out. It can also cause the vinyl material to become brittle and prone to cracking.
- Temperature Extremes: Rapid changes in temperature cause the vinyl to expand and contract. Over time, this constant movement can stress the adhesive (decals), leading to cracking, peeling, or bubbling.
- Snow and Ice: Winter conditions, including heavy snow, ice, and road salt, can be corrosive. While decals are designed for weather durability, persistent exposure to harsh chemicals like road salt can degrade the vinyl or its adhesive.
Practical Advice to Extend Decal Longevity by Protecting Against Environmental Factors
While high-quality decals boast inherent UV resistance and weather durability, proactive measures can significantly extend their life.
- Park in the Shade: Whenever possible, park your vehicle in shaded areas or in a garage. This is the most effective way to minimize direct exposure to harmful UV rays, drastically slowing down fading and material degradation.
- Regular, Gentle Washing: As mentioned, routine cleaning removes corrosive elements like bird droppings, tree sap, and road salt that can otherwise etch into or degrade the vinyl over time.
- Consider Protective Coatings (with caution): Some automotive paint sealants or waxes are safe for vinyl, but always check product labels or consult with a professional detailer before applying anything directly over your decals. Avoid abrasive waxes or those with petroleum distillates, as they can damage the vinyl.
- Address Damage Promptly: If you notice any lifting edges or bubbles, address them quickly. A small lift can become a larger peel if not re-adhered, preventing moisture or dirt from getting underneath.
By integrating these care and protection strategies into your vehicle maintenance routine, your automotive decals can easily last 5 to 7 years, and often longer, maintaining their bold colors and sharp lines despite Michigan's challenging conditions.
Even with the best care, there comes a time when a change is in order, whether you're updating your vehicle's look or simply need to remove an old decal. The good news is that removing old decals doesn't have to be a daunting task that risks your vehicle's pristine finish. With the right techniques and a little patience, you can safely remove existing Michigan car decals, leaving your vehicle's paint and windows just as they were before.
Safe Decal Removal When It's Time for a Change
When it's time for a refresh or an update, knowing how to remove old decals without damaging your vehicle is crucial. This section details gentle yet effective methods for decal removal, ensuring your car's paint or windows remain pristine while efficiently tackling any lingering adhesive residue.
Gentle Methods for Decal Removal
Removing car decals without causing damage to your vehicle paint or vehicle windows requires a careful approach. The goal is to loosen the adhesive (decals) without harsh scraping or chemical reactions that could harm the underlying surface.
Utilizing Heat to Loosen Adhesives
One of the most effective and gentle methods for decal removal involves applying heat. Heat helps to soften the adhesive (decals), making the decal more pliable and easier to peel away.
- Tools: A standard hairdryer or a heat gun set to a low temperature.
- Technique: Hold the heat source a few inches away from the decal, moving it constantly to ensure even heating. Focus on one small section at a time, warming it until it feels warm to the touch (but not hot enough to damage the paint). As the decal warms, gently begin to peel it back from an edge, using your fingernail or a plastic razor blade. Pull the decal slowly and steadily at an acute angle (close to 180 degrees) back over itself. This helps to lift the adhesive cleanly.
If the decal starts to tear or the adhesive resists, reapply heat to that section. Patience is key to preventing tearing and leaving less adhesive (decals) behind.
Employing Specialty Adhesive Removers
For stubborn decals or leftover residue, a specialized adhesive (decals) remover can be invaluable. These products are formulated to dissolve adhesive without harming automotive finishes.
- Products: Look for automotive-specific adhesive removers (e.g., isopropyl alcohol, Goo Gone Automotive, or dedicated decal removal sprays). Always read the product instructions and test on an inconspicuous area of your vehicle first to ensure compatibility with your paint or window tint.
- Technique: Apply the remover to a clean microfiber cloth, then gently rub it over the remaining adhesive. Allow the product to soak for the recommended time (usually a few minutes) to allow it to break down the bond. Then, gently wipe away the softened adhesive. For more persistent residue, you might need to repeat the process.
Important Safety Note: Never use harsh chemical solvents like acetone, paint thinner, or nail polish remover on your vehicle paint, as these can permanently damage the clear coat and underlying finish. Even on vehicle windows, harsh chemicals can potentially damage window tinting or other coatings.
Tackling Leftover Adhesive Residue
Even after the main decal is removed, you might find some sticky adhesive (decals) residue left behind. Addressing this promptly ensures a clean finish.
- Gentle Scraping: For small, stubborn spots, a plastic razor blade can be used very carefully. Hold it at a very shallow angle to the surface and gently scrape away the residue. Plastic blades are much safer than metal ones, especially on painted surfaces, as they are less likely to scratch.
- Wiping Away: After using heat or an adhesive remover, wipe the area thoroughly with a clean microfiber cloth. You might need to dampen the cloth with a bit more remover or a general automotive cleaner to fully clean the surface.
- Final Clean-Up: Once all the adhesive (decals) residue is gone, wash the area with mild car soap and water to remove any chemical residue from the remover. This also helps to restore the paint's natural shine and prepares the surface if you plan to apply a new decal or wax.
Video: Your Guide to State of Michigan Car Decals: Styles & Best Care Tips!
Frequently Asked Questions About Michigan Car Decals
What are the common styles of State of Michigan car decals?
Common styles include block 'M' logos, outlines of the state map (often with a heart), "Pure Michigan" branding, and university-specific designs. Many state of Michigan car decals feature iconic Michigan imagery or mottos reflecting state pride.
How should I prepare my car's surface before applying a decal?
Thoroughly clean the application area with soap and water, then dry it completely. For best adhesion, wipe the surface with rubbing alcohol to remove any residues or wax. Ensure the surface is cool and out of direct sunlight for optimal results.
What are the best tips for maintaining my state of Michigan car decal?
To prolong the life of your state of Michigan car decal, avoid high-pressure washing directly over it. Hand washing with mild soap is ideal. Refrain from scrubbing the decal aggressively, and parking in the shade can help prevent sun fade over time.
Can a state of Michigan car decal damage my vehicle's paint upon removal?
When properly applied and removed, state of Michigan car decals should not damage factory paint. However, if removed improperly (e.g., peeling too fast) or left on for many years, slight ghosting or minor adhesive residue may occur. Using heat and an adhesive remover helps prevent issues.
By following these simple guidelines, your state of Michigan car decals will continue to look great and express your Wolverine State pride for a long time. Enjoy your personalized ride!
Related Posts:
- Michigan Female Escorts: Legal Truths & Safety Guide 2024
- Rockport State Park Michigan: Guide to Dark Skies & Fossils!
- Williamston Inn Michigan: Your Secret Guide to Unforgettable Stays!
- Michigan Statute of Limitations Debt: A Critical Guide for You!
- Duane Waters Hospital Michigan: Its Vital Legacy Unveiled Now!
